
Today, you can create fantastic HDR compositions using advanced software. This software largely automates the process, and there are many types of HDR programs available.
In this comparison, we look at two of the best: Aurora HDR vs Photomatix Pro.
This article reviews and compares the latest versions of both software – Aurora HDR and Photomatix Pro 6.3.
Aurora HDR vs Photomatix Pro: Table of Contents
- Aurora HDR Overview
- Photomatix Pro Overview
- Aurora HDR vs Photomatix Pro 6.3: A Detailed Comparison
- Price
- System Requirements
- Layout
- Tools
- Presets
- Importing and Exporting
When you buy through links on our site, we may earn a commission at no cost to you. We evaluate products independently. Commissions do not affect our evaluations.
Aurora HDR Overview
Aurora HDR offers a high-quality HDR merging process together with extensive editing tools and workflow boosts from AI technology.
Aurora HDR is one of the most comprehensive HDR programs available. You can grab it as a standalone program or as a plugin for Apple Photos, Adobe Photoshop, and Adobe Photoshop Lightroom Classic.
Related Post: Aurora HDR Review
It has an advanced HDR engine that utilizes AI technology. This delivers excellent-quality HDR images, and you can apply stylistic edits to images, too. Aurora HDR also has a great range of editing tools, not to mention batch-processing capabilities.
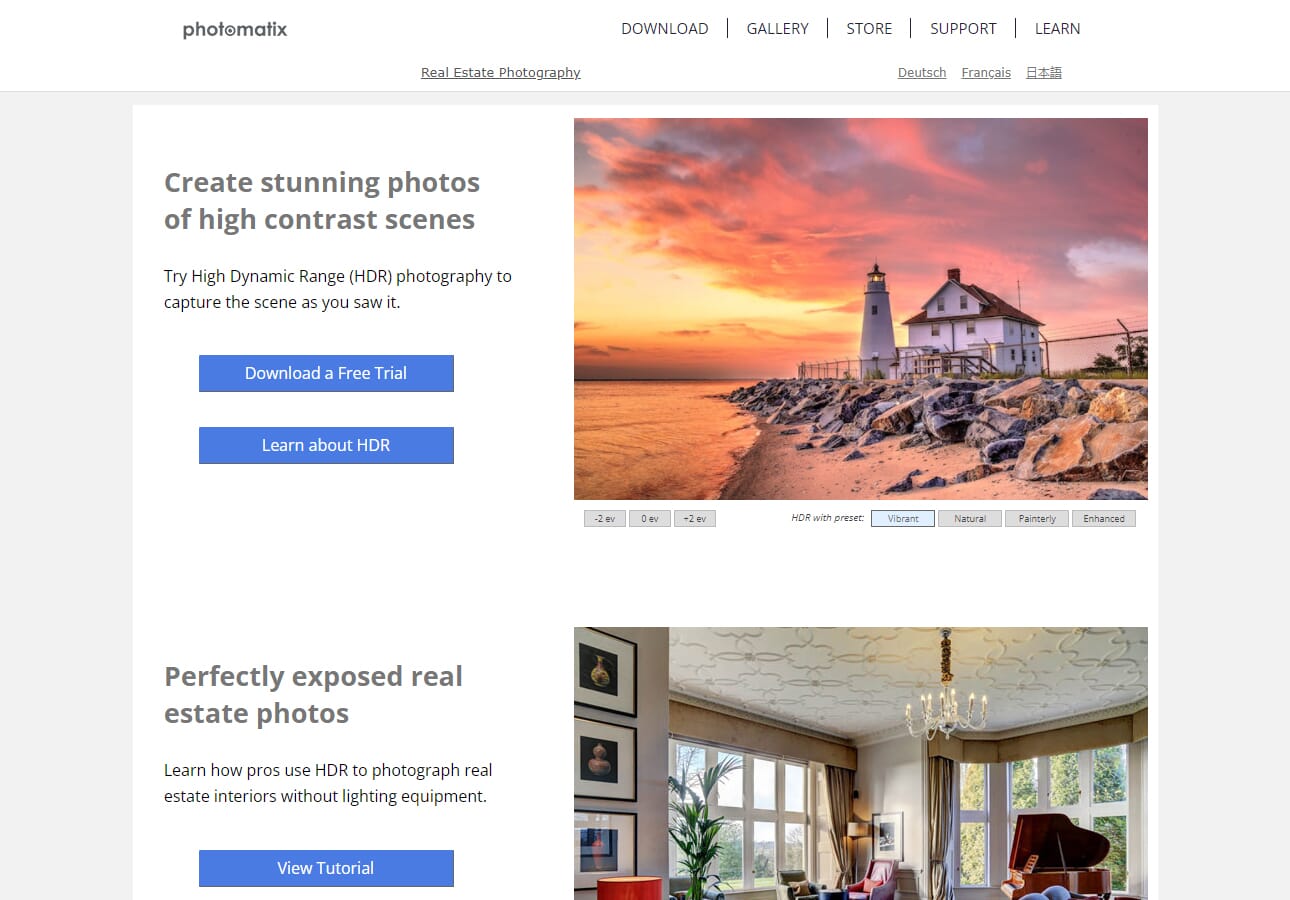
Photomatix Pro Overview
Photomatix Pro 6.3 has a streamlined process and some excellent batch-processing tools that allow you to quickly create multiple high-quality HDR images.
Photomatix Pro 6.3 is the latest version of this popular Photomatix HDR software. This version includes an HDR merging performance improvement. It also adds support for Canon EOS R and Nikon Z cameras and their associated RAW file formats. And it supports the M1 Apple processing chip.
Related Post: Photomatix Pro 6 Review
Photomatix Pro 6.3 is a comprehensive program. It has a detailed HDR merging process that gives users complete control. It also has a good range of tools for editing your final high dynamic range composition afterward. This includes alignment tools, presets, and basic adjustment tools.
Aurora HDR vs Photomatix Pro 6.3: A Detailed Comparison
To provide a clear comparison between these two HDR software choices, we have broken this article into different sections. For each section, we look at both programs so you can see which is the better choice based on factors such as price, system requirements, and tools.
Price
First, let’s look at the price. The good news is that both programs are great for those working on a tight budget or who don’t want a monthly subscription fee.
Here’s how much they cost:
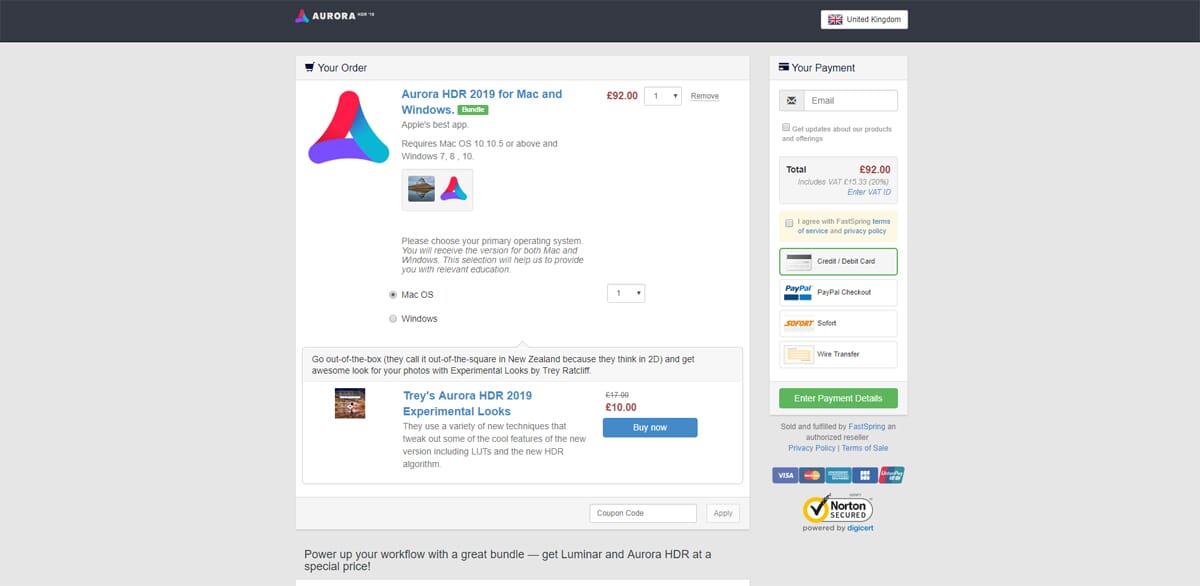
Aurora HDR
- Aurora HDR Cost: $92.00 one-time payment
- Available platforms: Windows and macOS
Photomatix Pro 6.3
- Photomatix Cost: $99.00 license fee
- Available platforms: Windows & Mac OS
Photomatix 6.3 is a little more expensive than Photomatix 6.1. The previous version was $69.00, while Photomatix Pro 6.3 retails at $99.00. This increase in price is warranted, however; the latest version supports Apple M1 chip devices, has a 60% boost in performance, and also supports additional cameras.
System Requirements
Next, we’ll take a look at system requirements. Some good questions to ask are:
- What processing power do you require?
- Is either product particularly resource-intensive?
- Is your computer up to the task of running the programs?
Aurora HDR |
Photomatix Pro 6.3 |
|
| Processor | Intel Core i5 or higher | Intel Core i5 or higher |
| Memory | Minimum of 8 GB | Minimum of 4 GB |
| HDD | 3 GB/SSD-grade performance | 1 GB/SSD-grade performance |
| Graphics | Open GL 3.3 or later | Open GL 3.3 or later |
| Display | Minimum of 1280×768 | Minimum of 1024×768 |
Aurora HDR
Aurora HDR is certainly the more power-hungry software. You’re going to need 8 GB of RAM to make it run smoothly. Less than that and it will struggle to run. That being said, the other requirements aren’t too serious.
Photomatix Pro 6.3
Photomatix Pro 6.3 remains the better choice in terms of minimum system requirements. Although version 6.3 has a 60% increase in performance, the system requirements remain the same.
You need only half the memory of Aurora HDR (4 GB). However, as with any HDR software, memory is a key component of the rendering process. While 4 GB is sufficient, 8 GB or more will make the HDR merging process run faster and smoother.
Layout
The actual layout of the program is of great importance; you need to be able to access the tools, apply filters, and change the HDR parameters easily.
So which program does it best?
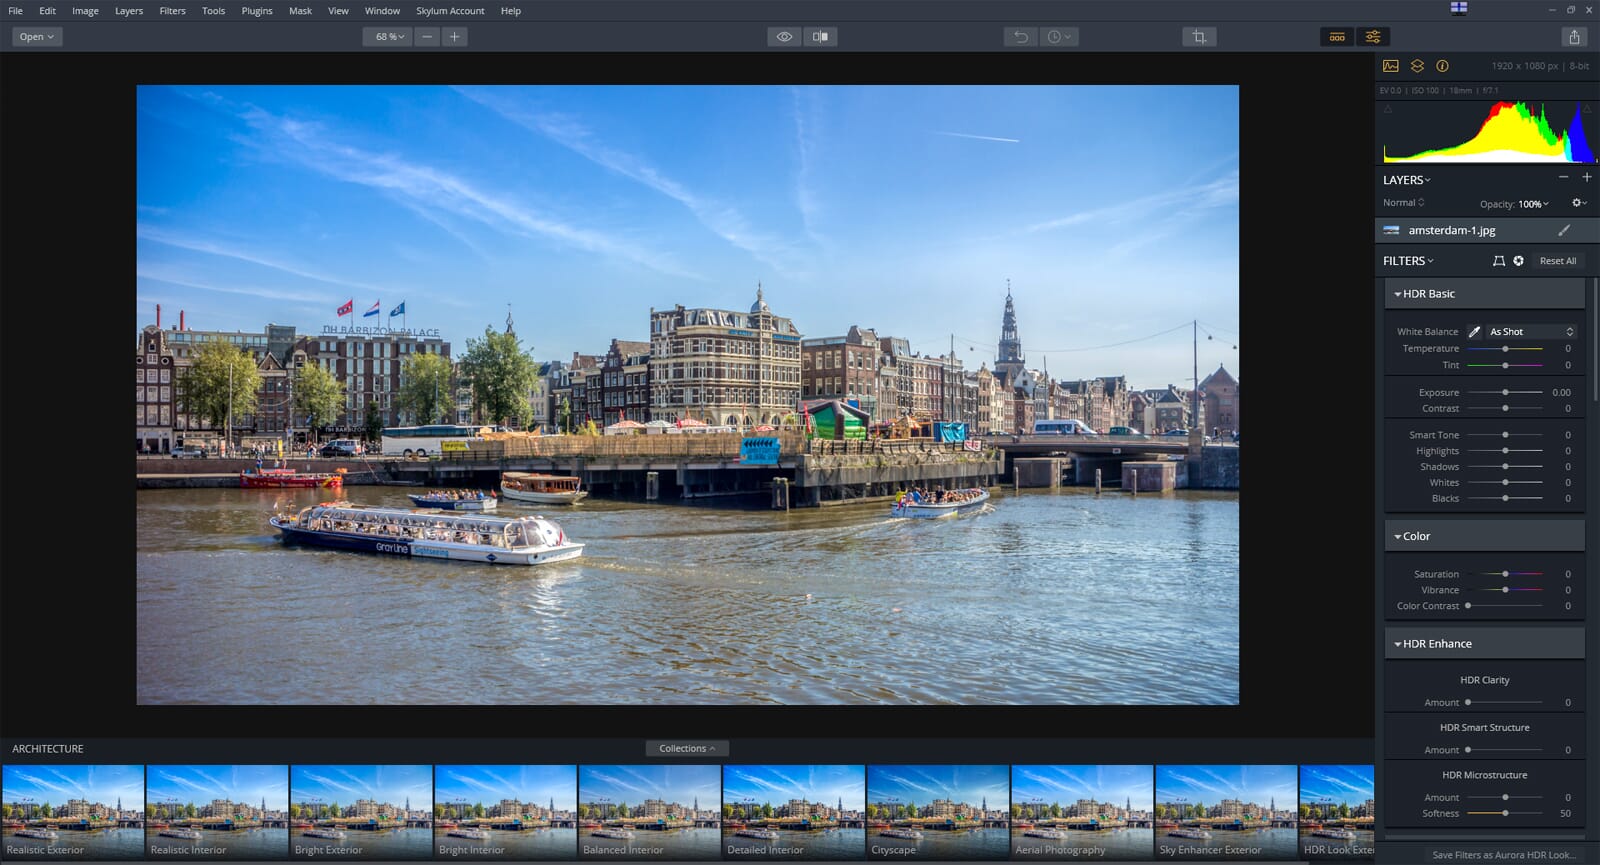
Aurora HDR
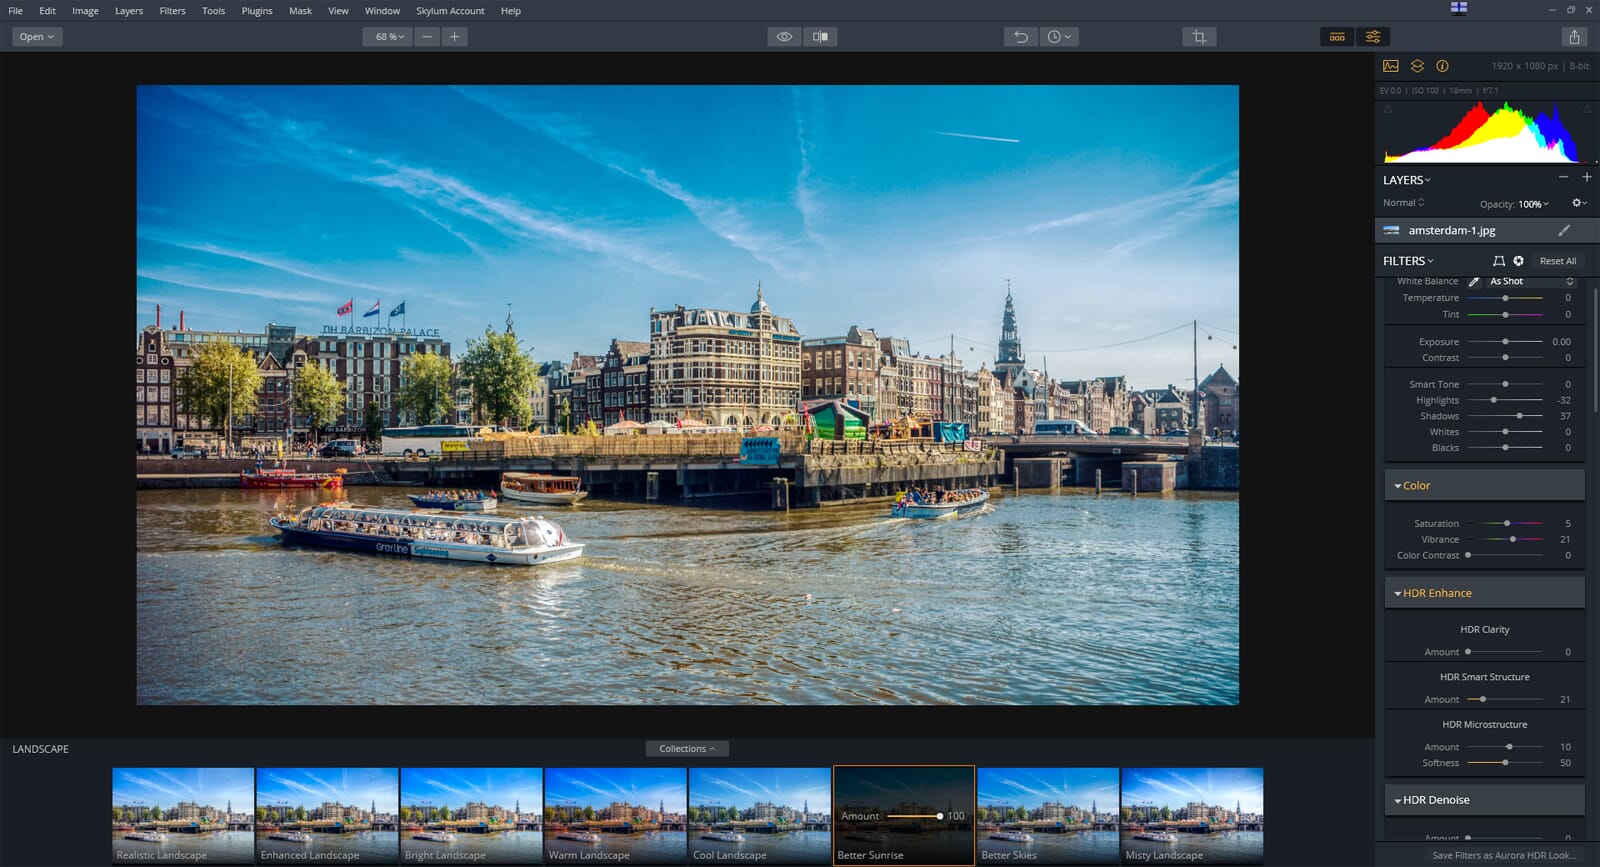
Aurora HDR has a simple layout that’s user-friendly. On the right-hand side, there’s the main adjustment toolbar used to change the image parameters.
There are tools such as Tone, Structure, and Hue. The layout provides you with plenty of working space, and you can easily access the tools you require.
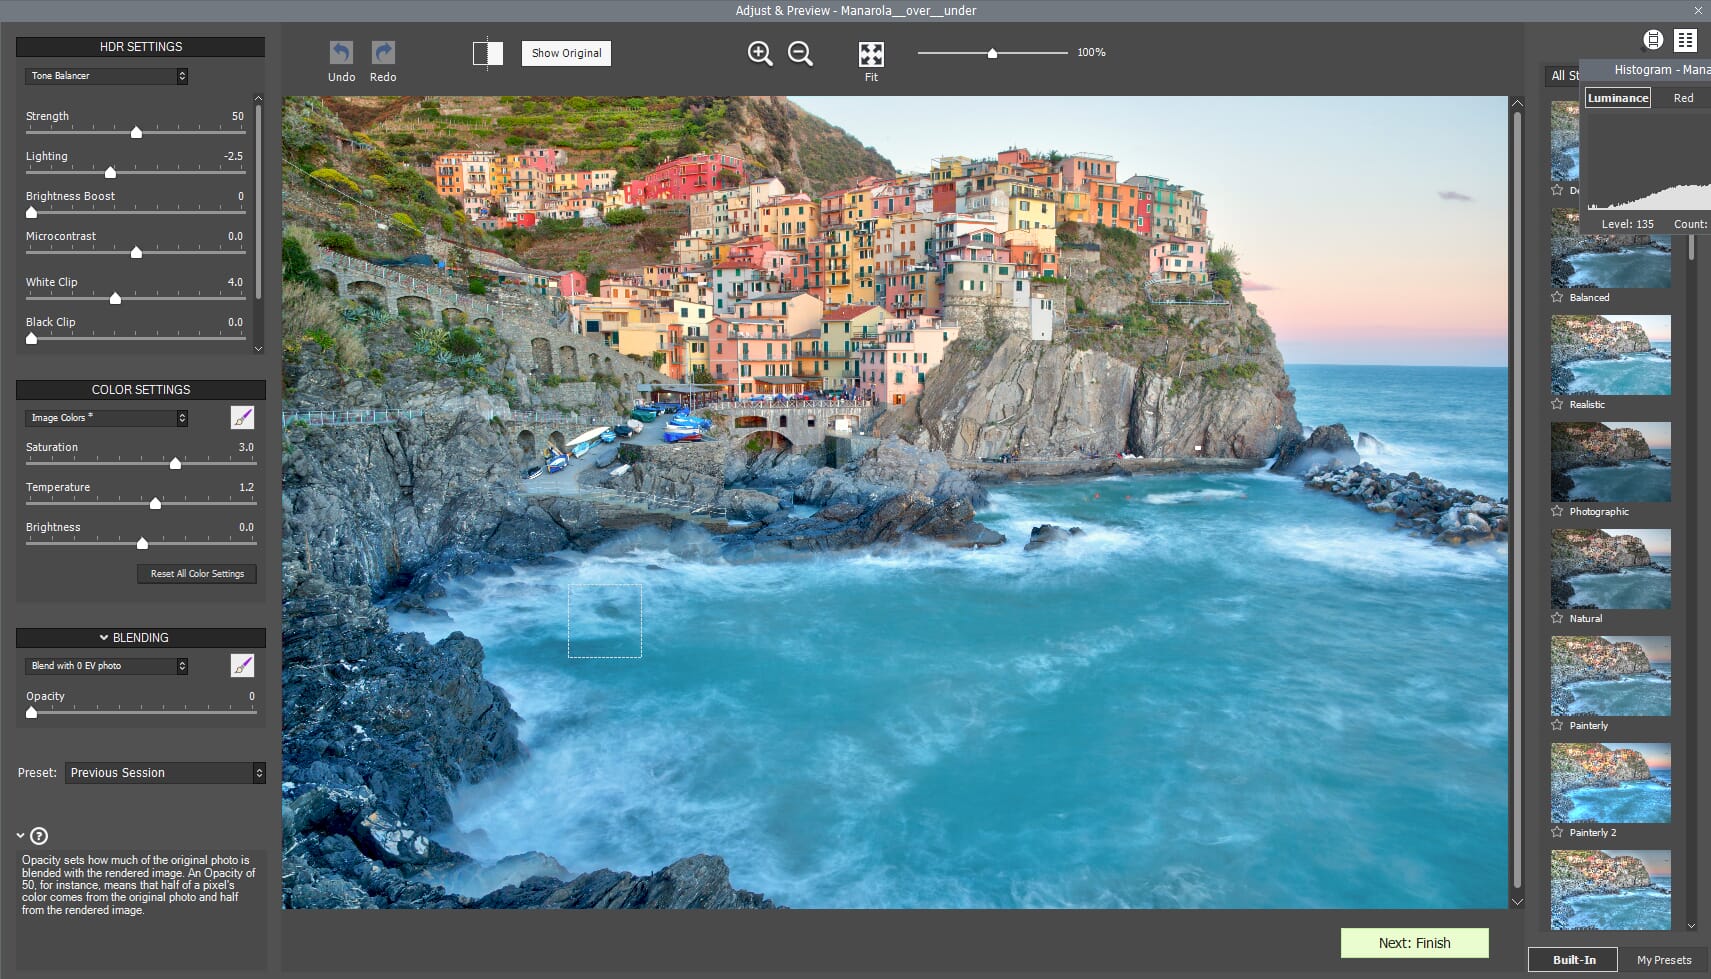
Photomatix Pro 6.3
The layout of Photomatix Pro 6.3 remains unchanged from Version 6.1. It is simple and follows common conventions for editing software.
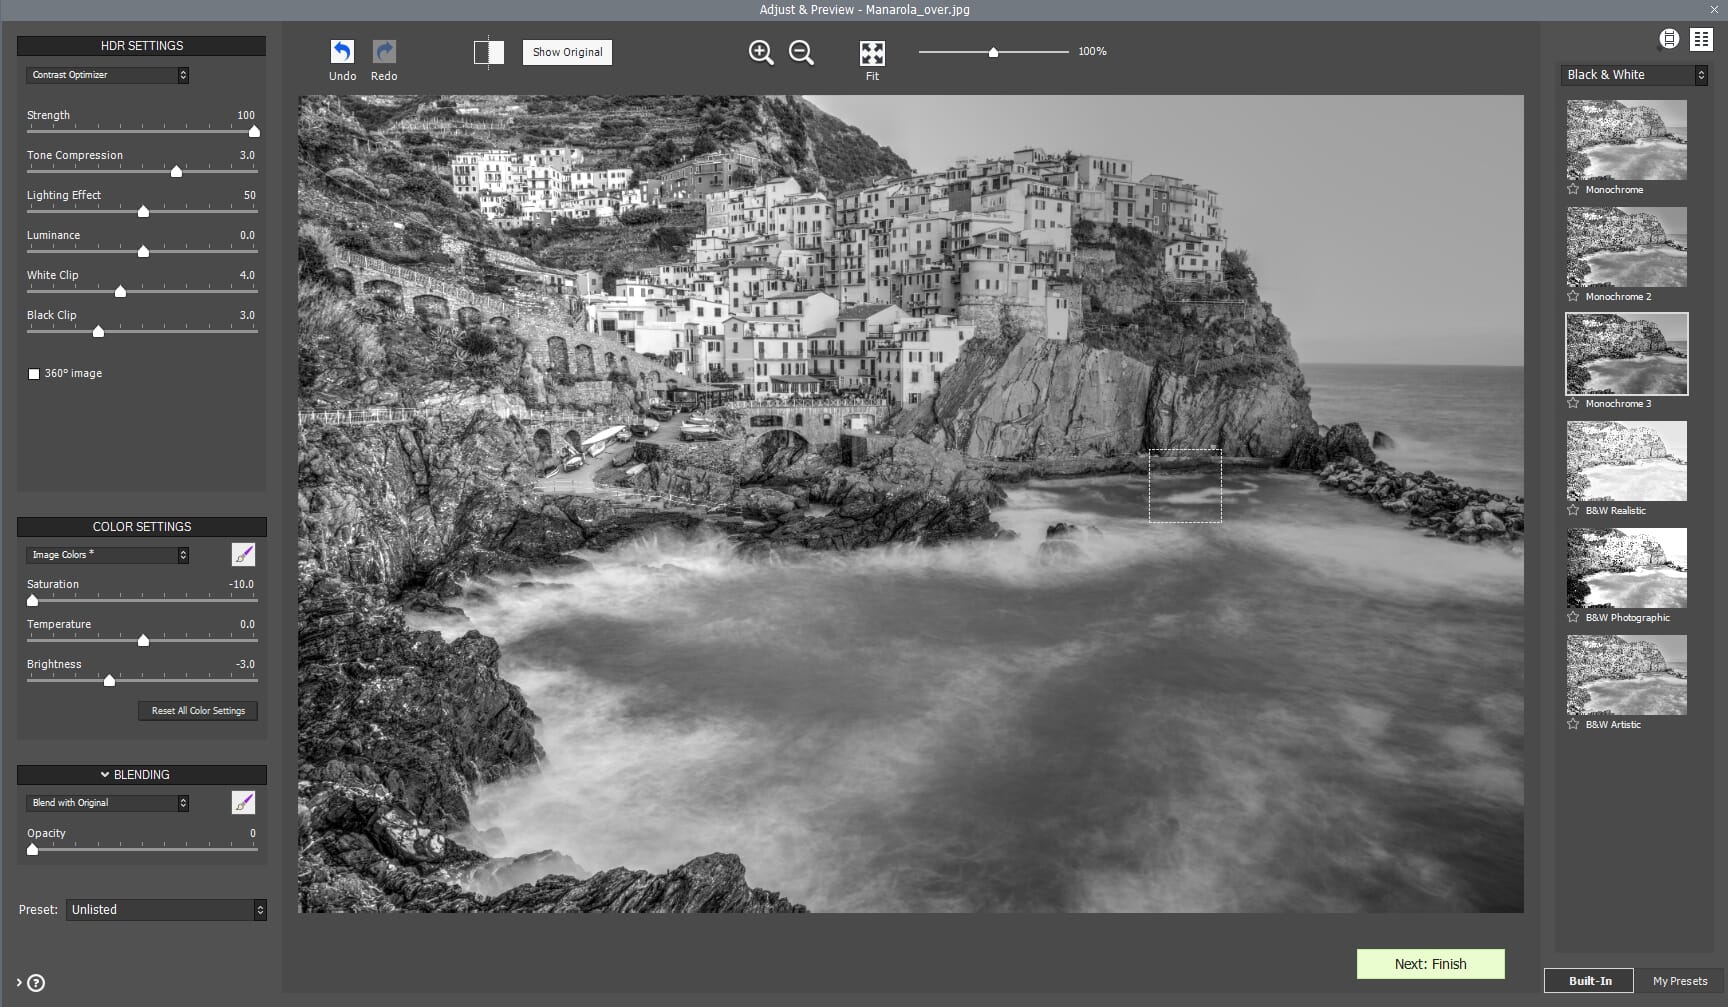
On the left-hand side, you’ll find the main HDR editing tools. These include blending options, color settings, and tone balancing. The central panel shows a preview of the image, where you can change views and also see a helpful before/after comparison.
On the right-hand side are various presets. It’s simple, uncluttered, and easy to follow.
The only issues we have with the layout are the pop-ups and new windows. For example, upon opening the software, there is a single window that shows file management options. However, on opening a series of bracketed images, the HDR editing tools open in a new window. And some items like the histogram have a window of their own.
This can cause confusion if you want to move the window or navigate to different parts of the software. It’s a minor issue, but we’d have preferred a single-window approach, and Aurora HDR offers a better layout.
Tools
Actual tools and features are key parts of our Aurora HDR vs Photomatix Pro 6.3 review. Obviously, you need a robust set of tools to easily edit your HDR photos. You want to be able to change image parameters without a hassle.
Cropping and rotation should be a breeze. And it should be easy to remove camera imperfections such as lens flare and distortion.
Aurora HDR
Aurora HDR really is a comprehensive program. It offers an abundance of tools to edit your HDR shots in practically every way imaginable. Once you’ve applied the basic HDR process, you can use the tools to tailor your images and make further tweaks.
The following are some of the tools you can use:
- HDR Basic
- Color
- HDR Enhance
- HDR Denoise
- LUT Mapping
- Adjustment Layers
- Masks
- Crop & Transform
We really liked the adjustment layers and masks. This means you can freely edit certain areas of a photo without disrupting the rest of the composition.
Photomatix Pro 6.3
Photomatix Pro 6.3 has a range of useful tools for editing HDR images. On the left-hand side, you can select the overall type of HDR image you wish to achieve. This changes the default settings and provides additional editing options.
Examples of HDR settings include Tone Balancer, Contrast Optimizer, and Details Enhancer. These different options should be used for different types of HDR photography (e.g., real estate and landscape photos).
You can also edit the colors, including temperature, saturation, and brightness. We like that there is even a brush tool for colors. This allows you to edit color settings in a targeted manner instead of changing the colors of the entire image.
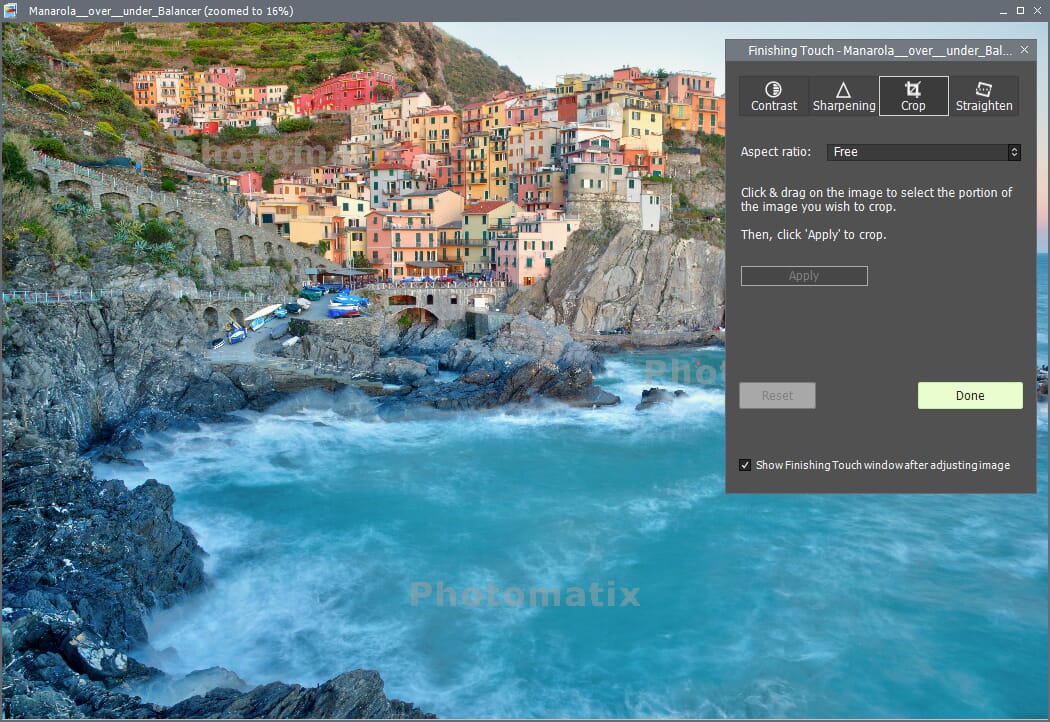
Once you have finished editing and press the “Finalize” button, a “Finishing Touch” dialog box opens. Here, you can adjust the contrast, sharpening, cropping, and alignment. The tools are especially useful if you’re looking to frame and finish your HDR composition.
Bottom line: Aurora HDR offers a greater variety of tools and better post-processing features. However, Photomatix 6.3 still allows you to comprehensively edit your final HDR images.
Presets
Part of what makes this type of software so appealing is the automation and AI. When processing HDR photos, you want a myriad of filters and automatic processes at your disposal.
Both Aurora HDR and Photomatix 6.3 offer filters and automation that can greatly speed up your workflow.
Aurora HDR
Aurora HDR has a great array of presets and filters. This version of the HDR program also has improved presets. You can actually mimic different styles of legendary photographers.
There are also specific presets for different photo types such as landscape and architecture. The following are some of the presets available:
- Essential
- Landscape
- Architecture
- Dramatic
- Artistic
- Trey Ratcliff
- Serge Ramelli
When applying filters, you can change the basic settings and adjust how strongly the filter is applied. For example, you can select the degree of opacity or change the saturation.
We also like how you can see a quick preview of the filter before you actually apply it.
Furthermore, you can process your photos with a high degree of automation. Aurora HDR utilizes AI technology to automatically assess your photos and transform them into something beautiful.
Photomatix Pro 6.3
Photomatix Pro 6.3 also has a variety of presets and some automation.
First, it offers a selection of “styles.” These are located on the right-hand side. They are split into different categories and include:
- Artistic
- Realistic
- Real Estate
- Black & White
- Details Enhancer
- Contrast Optimizer
- Tone Compressor
- Tone Balancer
Most of the styles are subtle and are meant to change the overall look of the HDR image to reflect different types of photos. The Real Estate styles and Realistic styles are particularly effective.
Some of the styles are geared toward creative work. For example, the Artistic and Black & White styles allow you to create HDR images with a specific look or theme. We also like the last block of styles, including the Details Enhancer and Contrast Optimizer options. These are useful if you want your HDR image to concentrate on specific things.
Photomatix Pro 6.3 also has two automatic options: Batch Process and Batch Process Single Image. These are incredibly useful tools if you have a large number of HDR images to create. If you have a catalog of bracketed images that all require the same editing style and output, batch processing will greatly speed up the process!
Importing and Exporting
An HDR program should have detailed importing and exporting features. When importing, you should be able to easily access your photos. Exporting should give you the option to save images using a myriad of file types and to alter different parameters.
Aurora HDR
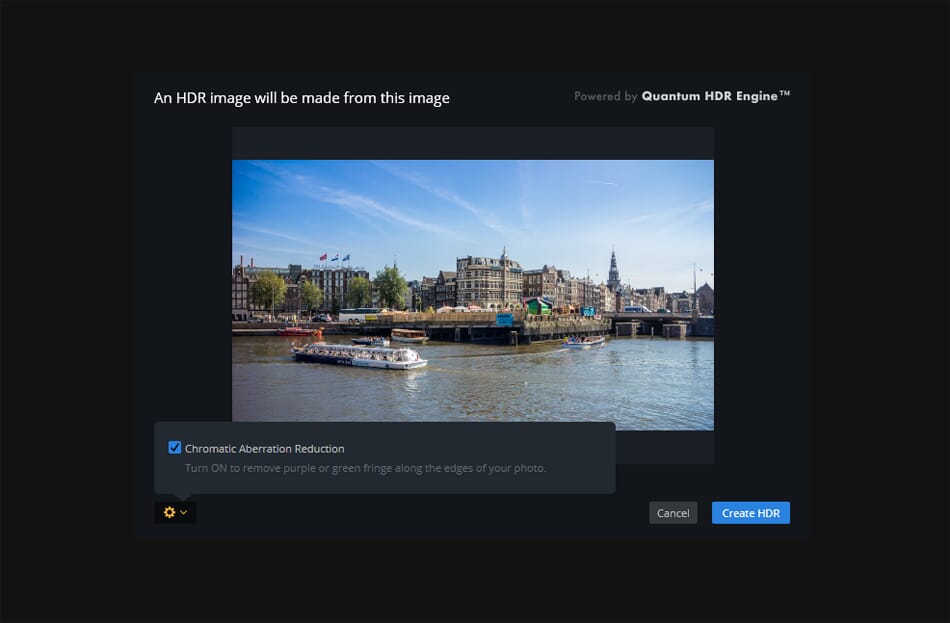
Opening a file in Aurora HDR is easy. A simple dialog box appears where you can select your file or bracketed images. You’re then taken to a screen where you can choose the parameters and settings for the initial HDR merge.
You can select the following:
- Auto Alignment
- Ghost Reduction
- Reference Image
- Chromatic Aberration Reduction
- Color Denoise
Basically, you can tweak the settings to give you the best end results for your HDR merge. This level of control over the importing and initial HDR process is nothing short of awesome.
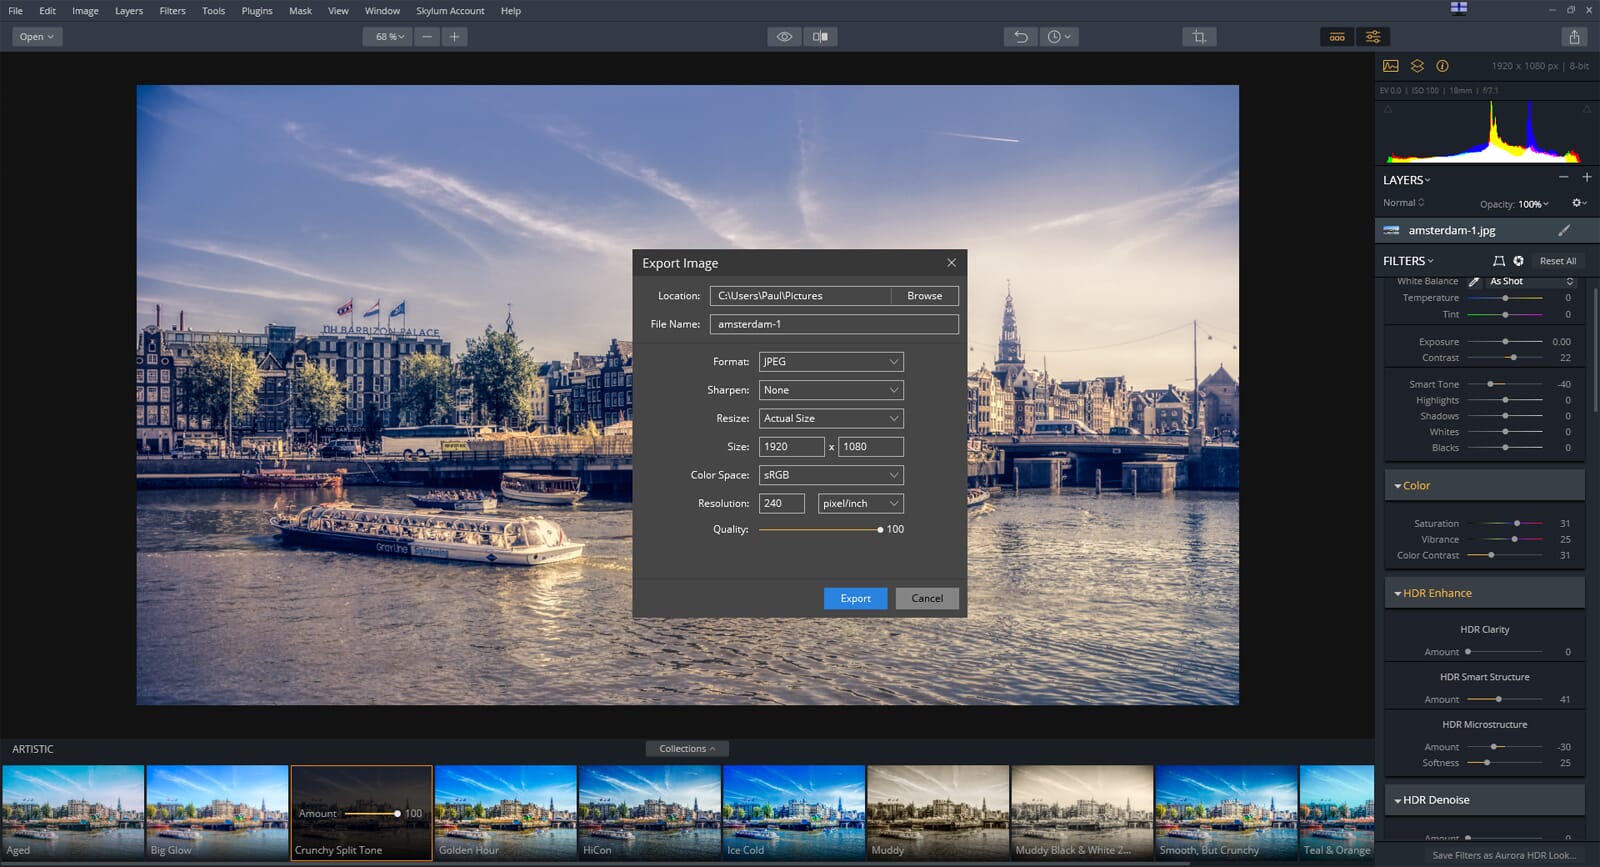
The export process is just as detailed. Aurora HDR once again offers great control over the settings and image parameters. When exporting an image, you’re presented with the following options:
- Format (TIFF, JPEG, PNG, etc.)
- Sharpen
- Resize
- Compression
- Depth
- Resolution
You can export the image for a variety of different purposes, such as printing or for use in digital media. The exporting options are a standout feature of Aurora HDR.
Photomatix Pro 6.3
The importing process and options in Photomatix Pro 6.3 are extensive. Once the software is open, you are given a series of file options. These include opening bracketed images or using batch-processing tools. There are also useful tutorials for new users.
Once you have opened a series of bracketed images, a new dialog box will appear. This contains the selected images and also shows their basic image parameters like shutter speed and aperture. You will then be given advanced merging options. Here, you can choose options like automatic alignment and cropping. You can also apply noise reduction and chromatic aberration reduction.
This process gives you full control over how you want your HDR image to be created. You can also see previews and look at the exposure information for each of the bracketed photos.
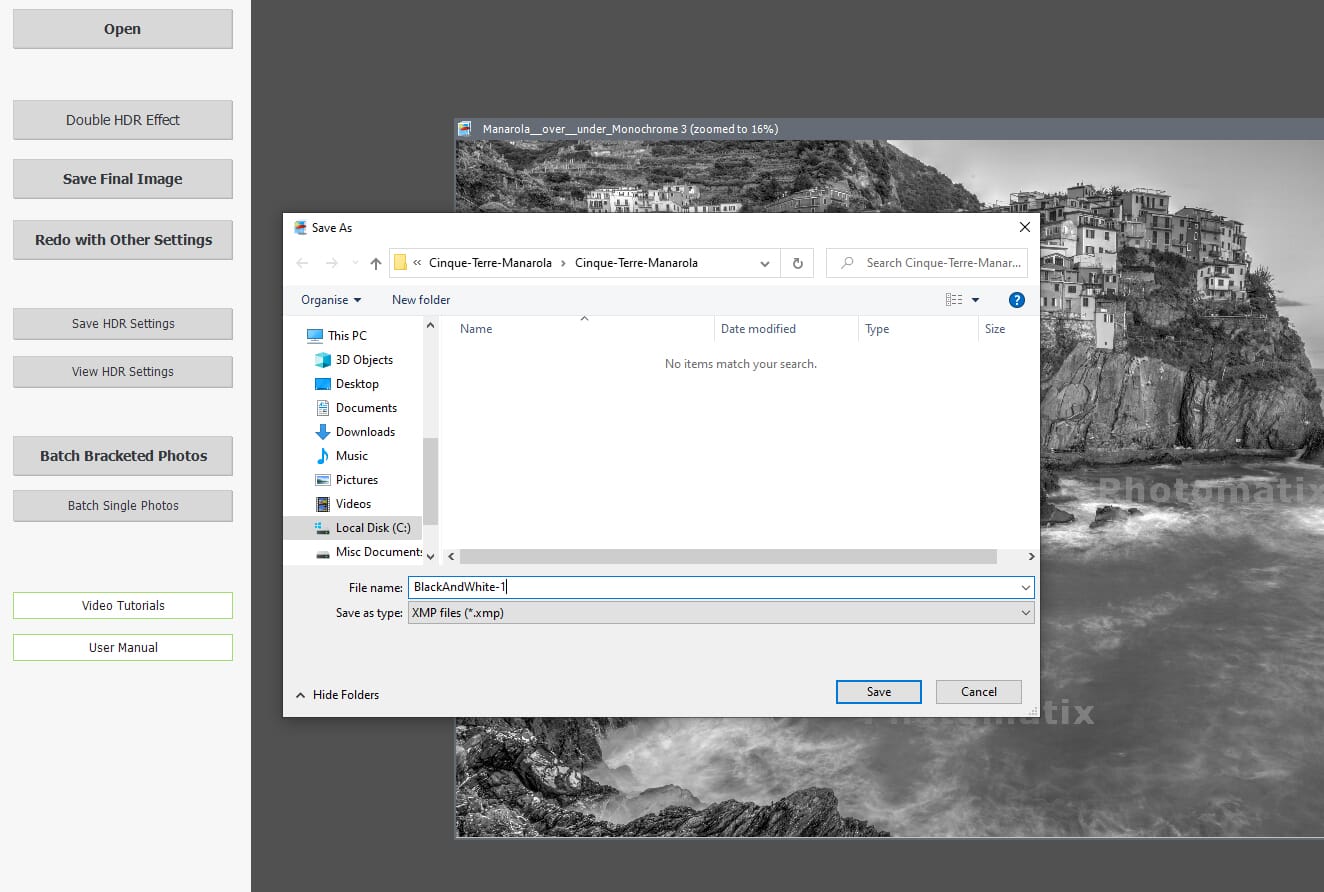
Photomatix Pro 6.3 also has decent exporting versatility. Once you are happy with your HDR image, you can access the “Finishing Touch” tools. Here, you can change the contrast, apply sharpening, crop the final image, and re-align it.
The file exporting options are limited. There is only a simple “Save” or “Save As” dialog box that allows you to save the HDR image as a JPEG or TIFF file. However, we like that you can choose to save the HDR settings as an XMP file for future use.